iOS AppをAppleに申請し公開する手順を説明する。
事前準備
iOSアプリの作成
iOSアプリを作成する。ビルドとアイコンは後で説明するので、ビルドとアイコンの設定以外が完成していれば良い。
アイコンの設定
1024×1024、透過なし画像を用意する。
(例)絶対音感というアプリの例

各サイズのアイコンを、この1024×1024の画像を元に生成する。ここでは下記の自動生成サイトを使う。

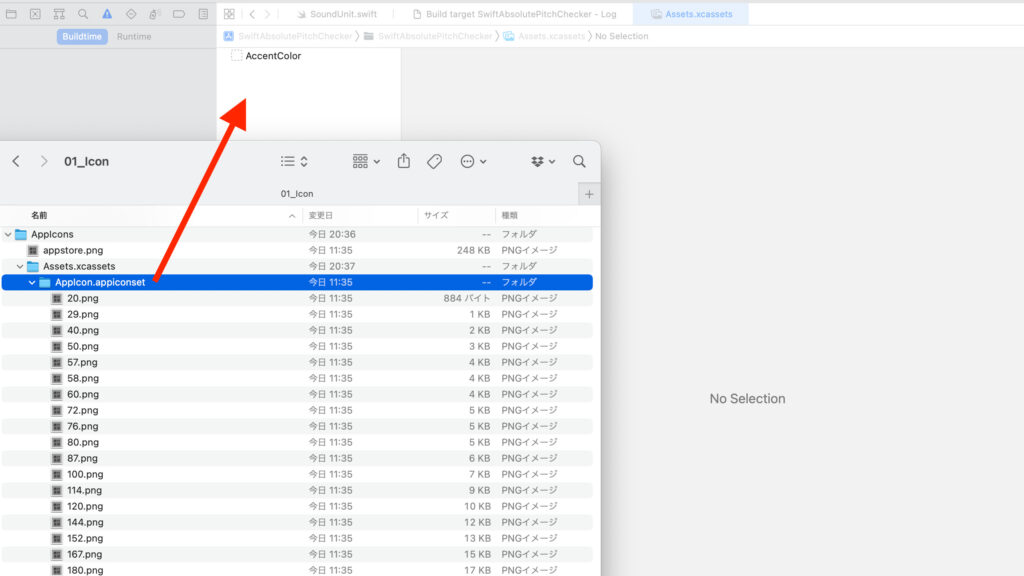
ダウンロードされたファイルを解凍すると次のようになっている。
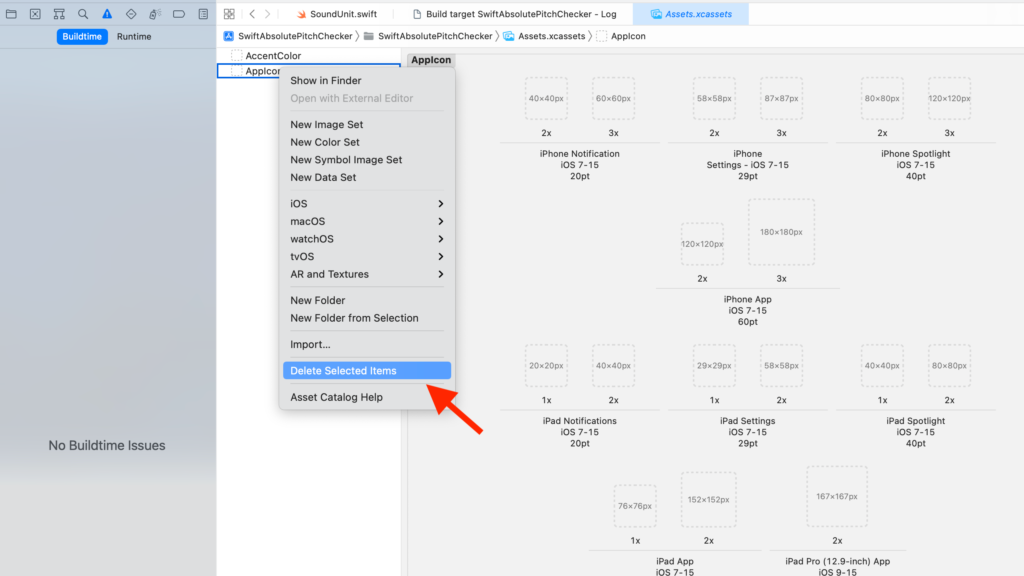
XcodeでAppIconのDelete Selected Itemsをクリックする。
上記生成したAppIcon.appiconsetというフォルダをドラッグ&ドロップする。
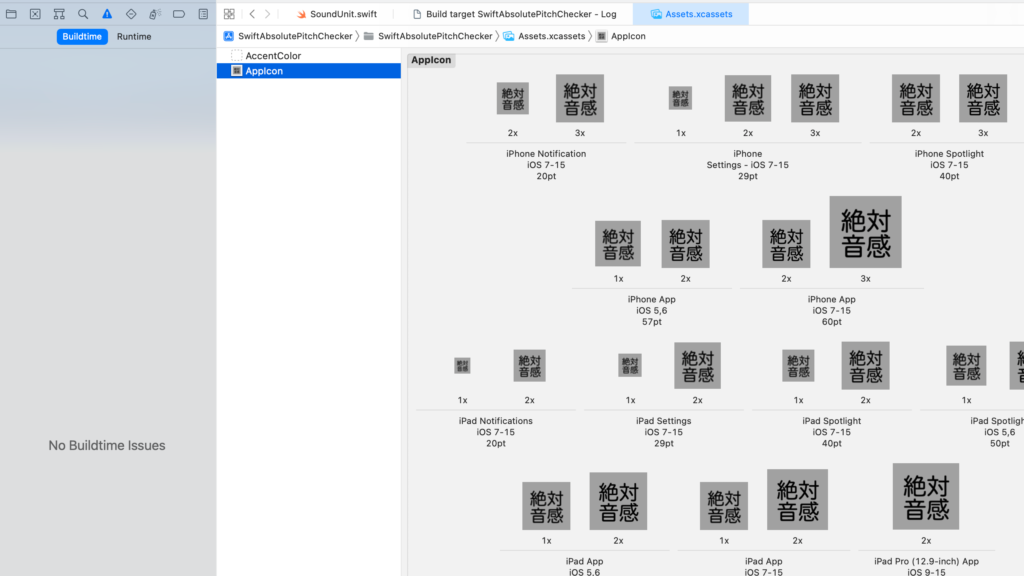
一気にアイコンが反映される。
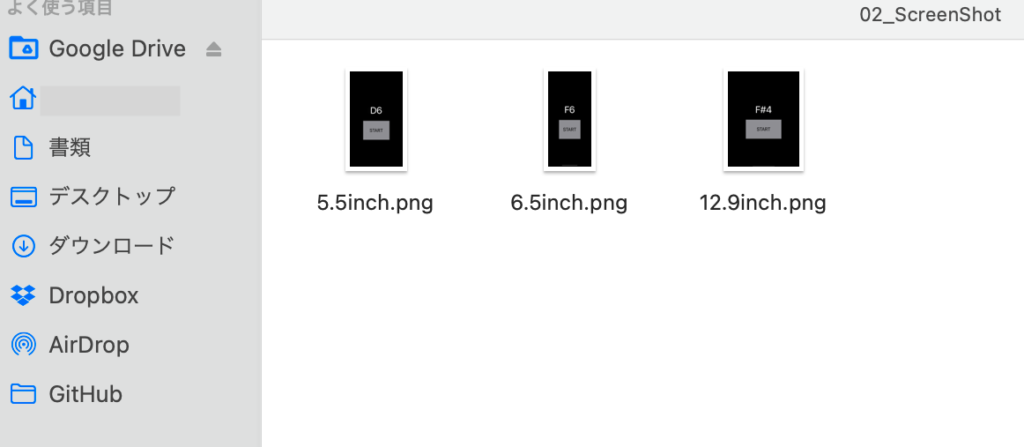
App Store公開用スクショ作成
・5.5 インチ
iPhone 8 Plus、iPhone 7 Plus、iPhone 6s PlusのどれかのシミュレータのスクショをPCに保存する。
・6.5 インチ
iPhone 13 Pro Max、iPhone 12 Pro Max、iPhone 11 Pro Max、iPhone 11、iPhone XS Max、iPhone XRのどれかのシミュレータのスクショをPCに保存する。
・12.9inch
iPad ProのどれかのシミュレータのスクショをPCに保存する。
これらはapp申請時に使用する。
プライバシーポリシー
Webページや画面等、アプリ内からプライバシーポリシーを表示できるようにしておく。
例 : txtファイルで作成しWebにupする。
下記をコピペし【】に適切な文言を入れれば良い。
【アプリ名】プライバシーポリシー

【自分の名前】(以下「当方」という)は、当方の提供する【アプリ名】の利用者(以下「ユーザー」という)に関する個人情報を含んだ情報(以下「ユーザー情報」という)の取扱いについて、以下のとおりプライバシーポリシー(以下「本ポリシー」という)を定めます。

1.情報を取得するアプリ提供者
【自分の名前】

2.取得するユーザー情報と目的
本アプリケーションで取得するユーザー情報はありません。

3.取得方法
なし。

4.通知・公表または同意取得の方法・利用者関与の方法
(1)通知・公表
当方は、本ポリシーに関する通知・公表は本アプリケーションに掲載する方法で行います。

(2)同意取得の方法
なし。

(3)利用者関与の方法
なし。

5.外部送信・第三者提供・情報収集モジュール
(1)外部送信
なし。

(2)第三者提供
なし。

(3)情報収集モジュール
なし。

6.お問い合わせ
当方のプライバシーポリシーに関する、ご意見、ご質問、苦情の申出その他ユーザー情報の取扱いに関するお問い合わせは、以下の窓口にご連絡ください。
【メールアドレス】

7.改定
当方は、当方の裁量に基づいて、本ポリシーを変更します。但し、取得するユーザー情報、利用目的、第三者提供に変更が発生した場合、本アプリケーションで通知するとともに、本ポリシー変更後、本アプリケーションの初回起動時に改めてユーザーから同意を取得します。

8.制定日・改定日
制定:****年**月**日
これを適当なレンタルサーバーでもいいのでup。
サポートURLに記入するページ
例えばこんな感じ。
<!DOCTYPE html>
<html>
<head>
  <title>【アプリ名】  app support page</title>
</head>
<body>
  <div>
    <p>【アプリ名】  app サポートページ</p>
    <p>iOS/ダウンロードリンク(公開後対応)</p>
    <p>お問い合わせ : 【メールアドレス】</p>
    <a href="【privacy policyへリンク先アドレス】">privacy policy</a>
  </div>
</body>
</html>
これを適当なレンタルサーバーでもいいのでup。
ブラウザ表示するとこんな感じ。
【アプリ名】 app サポートページ

iOS/ダウンロードリンク(公開後対応)

お問い合わせ : 【メールアドレス】

【privacy policyへのリンク】
Apple Developer Programへの参加
これは初回のみ必要な項目なので割愛。手順はググればわかる。年間USD99.00の金がかかる。
App IDの作成
App IDとは、アプリを識別するためのID。
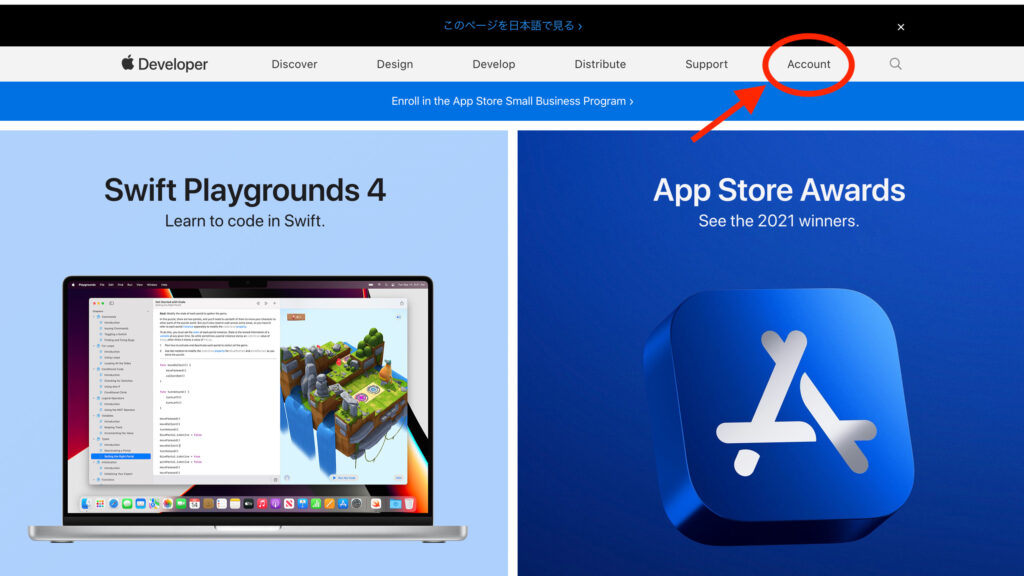
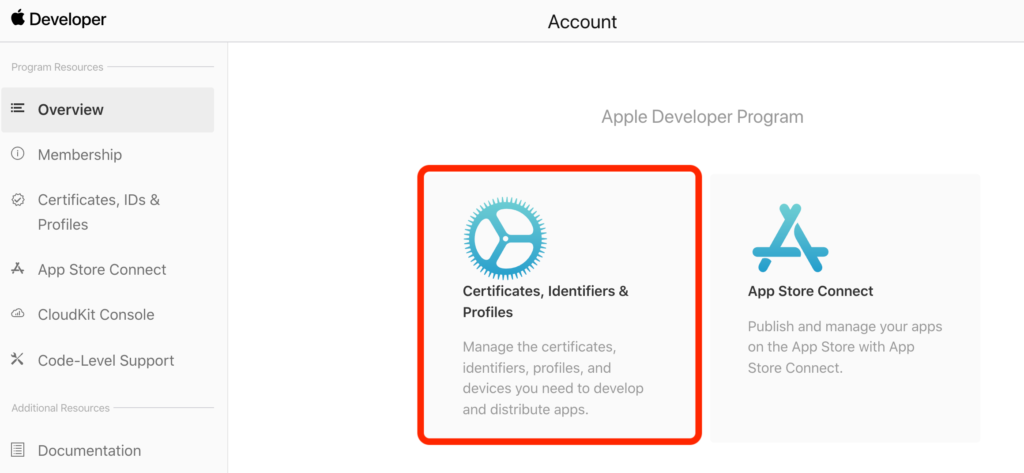
Apple Developerのページに行く。
Accountをクリック。
Certifidate, Identifiers & Profiles をクリック。
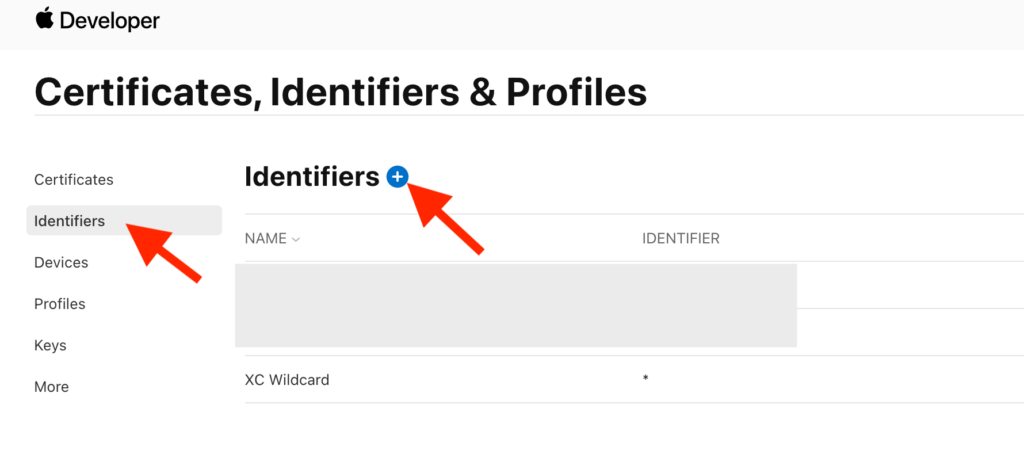
Identifiersをクリック。
+マークをクリック。
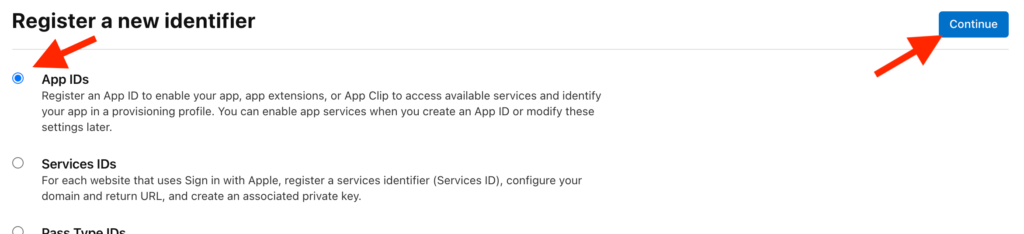
App IDsを選択。
Continueをクリック。
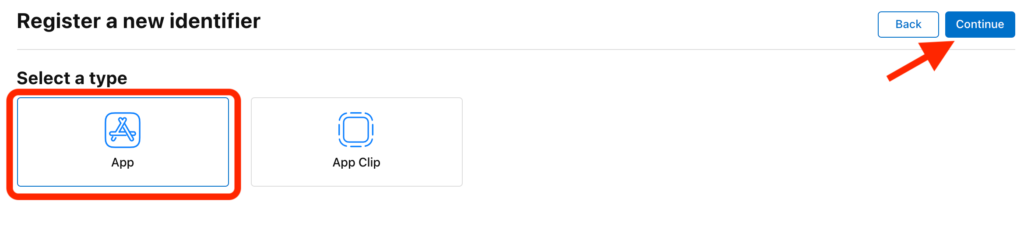
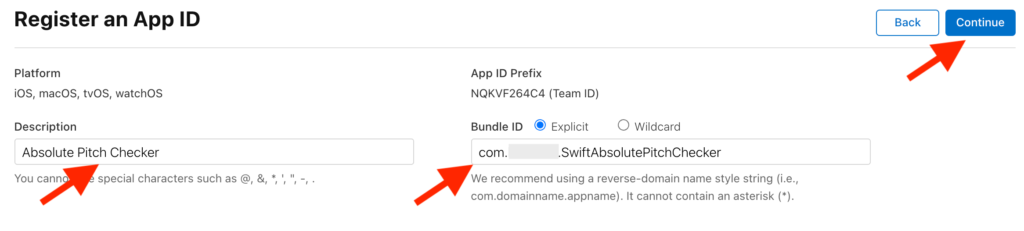
Appを選択。
Continueをクリック。
Descriptionを記入。アプリの説明なので何でもいい。
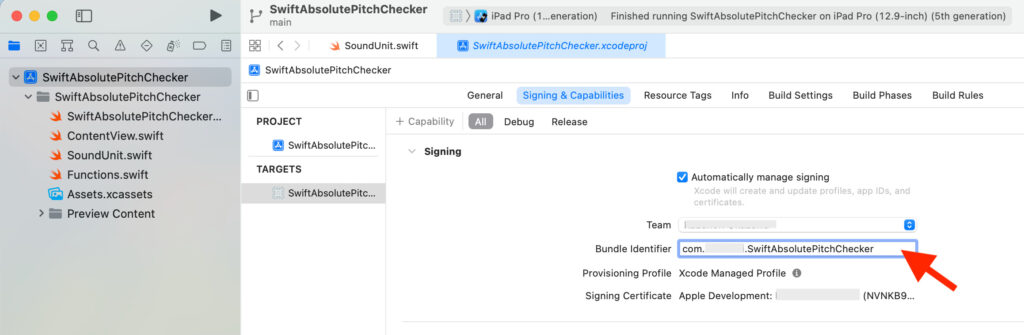
Bundle IDを記入。Xcodeからコピペする。
Continueをクリック。
※Bundle IDはXcodeのここに書いてある。
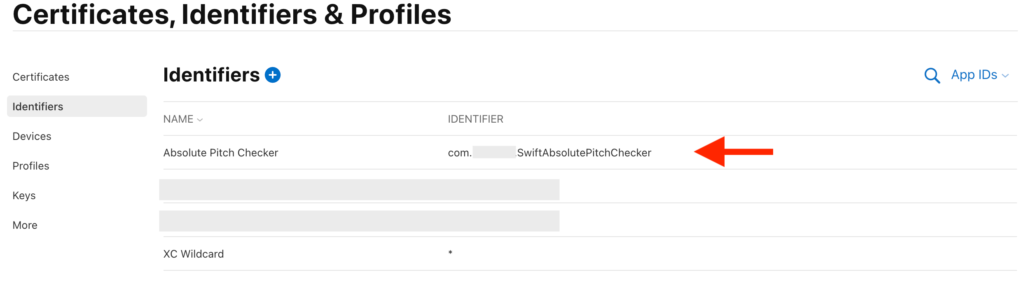
Registerをクリック。

追加された。
証明書の作成
※過去に他のAPP申請時とかに証明書を作成済みの場合この手順は不要。
証明書を登録しAppleからの認証を得ることで、プロビジョニングプロファイルの作成が可能になる。手順は下記サイトが参考になる。
プロビジョニングプロファイルの作成
プロビジョニングプロファイル(Provisioning profile)とは、App IDと証明書(Certificate)を紐づけるもの。Xcodeに登録することでアプリの申請が可能になる。
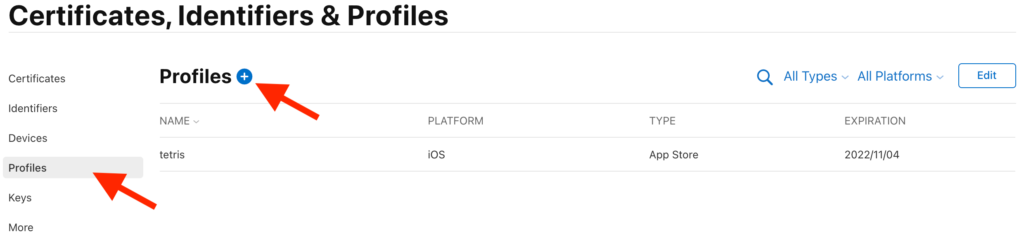
Profilesをクリック。
+マークをクリック。
App Storeを選択。
Continueをクリック。

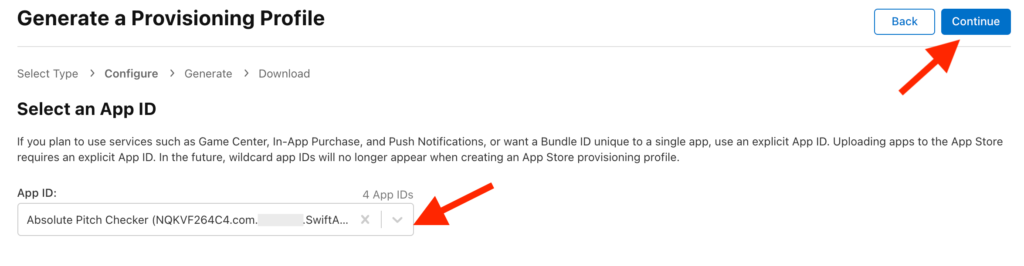
App IDを選択。
Continueをクリック。
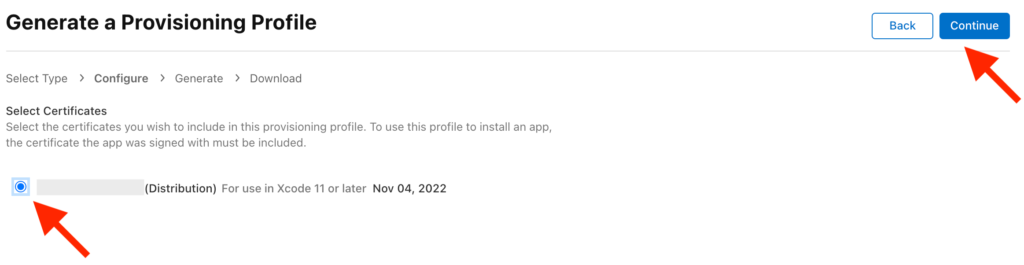
作成した証明書を選択。
Continueをクリック。
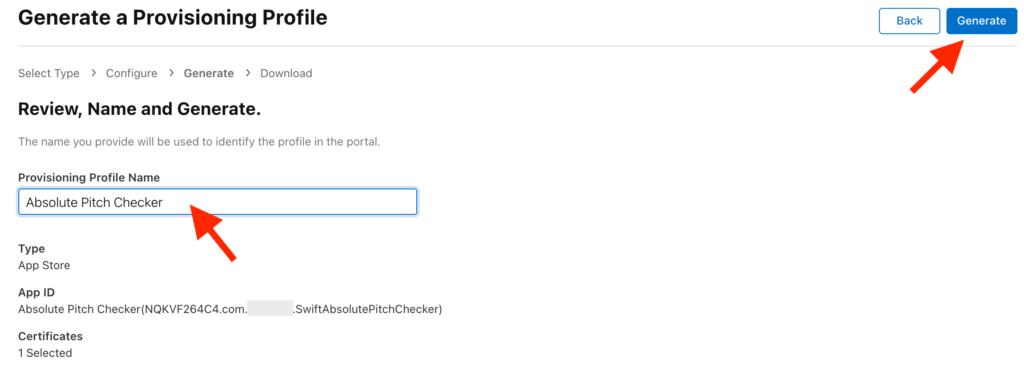
Provisioning Profile Nameを記入。任意の名前で良い。
Generateをクリック。
Downloadをクリック。
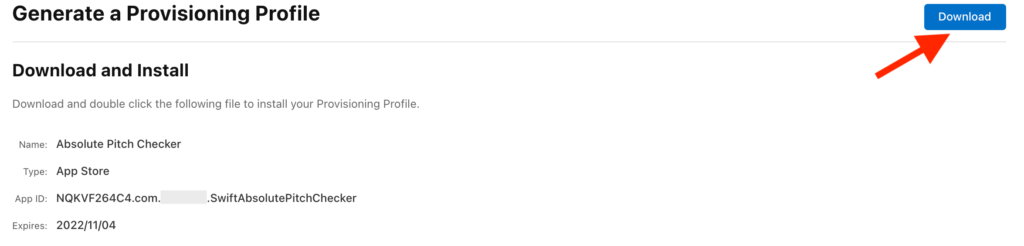
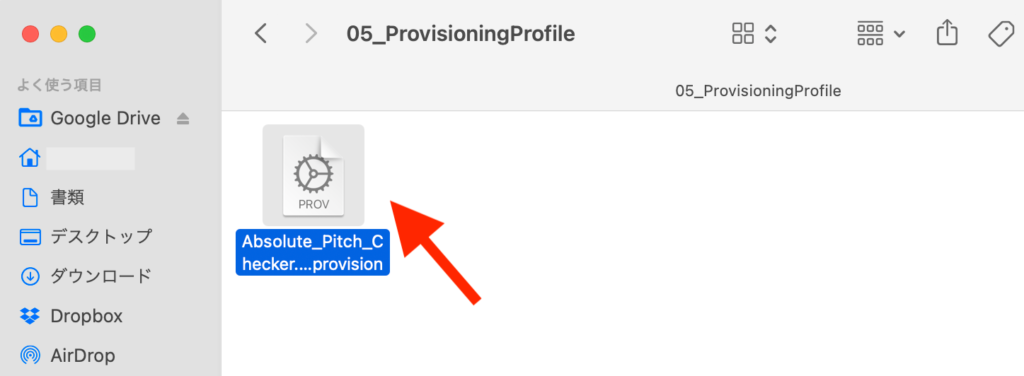
DownloadしたProvisioning Profileファイルをダブルクリック。
App Store Connect に登録
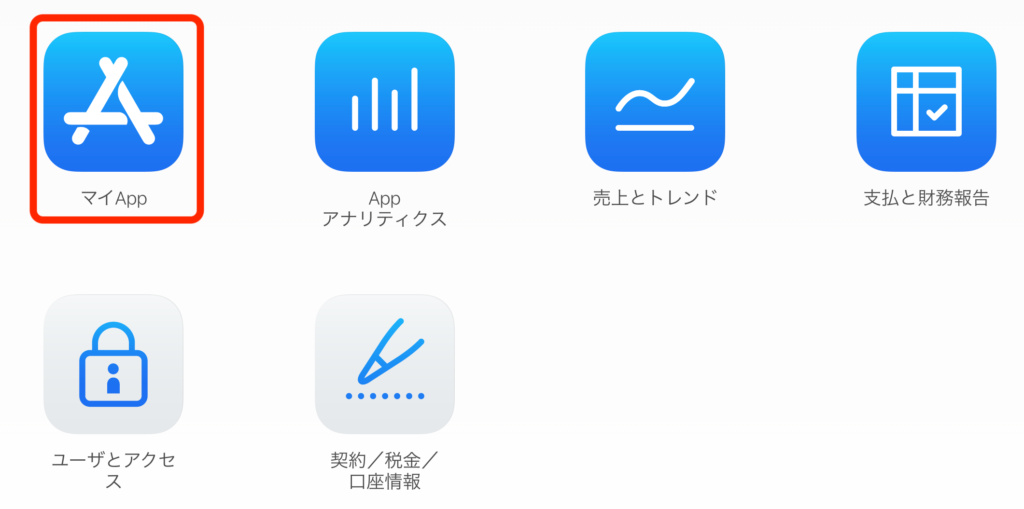
App Store Connectにログイン

マイAppをクリック。
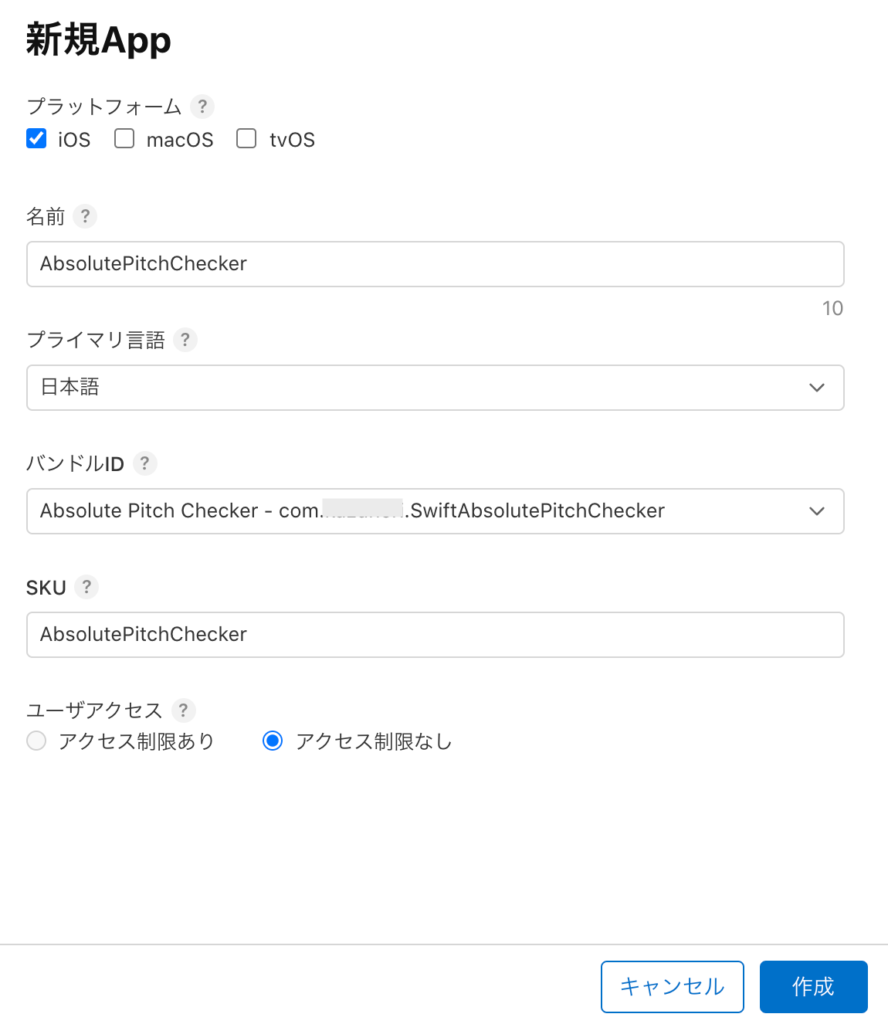
新規Appをクリック。

プラットフォーム: iOSをチェック
名前: アプリ名を入力
プライマリ言語: 日本で配信するなら「日本語」を選択
バンドルID: アプリのBundle IDを選択
SKU: 任意の英数字を入力(アプリ名が良い)
ユーザーアクセス: アクセス制限なし
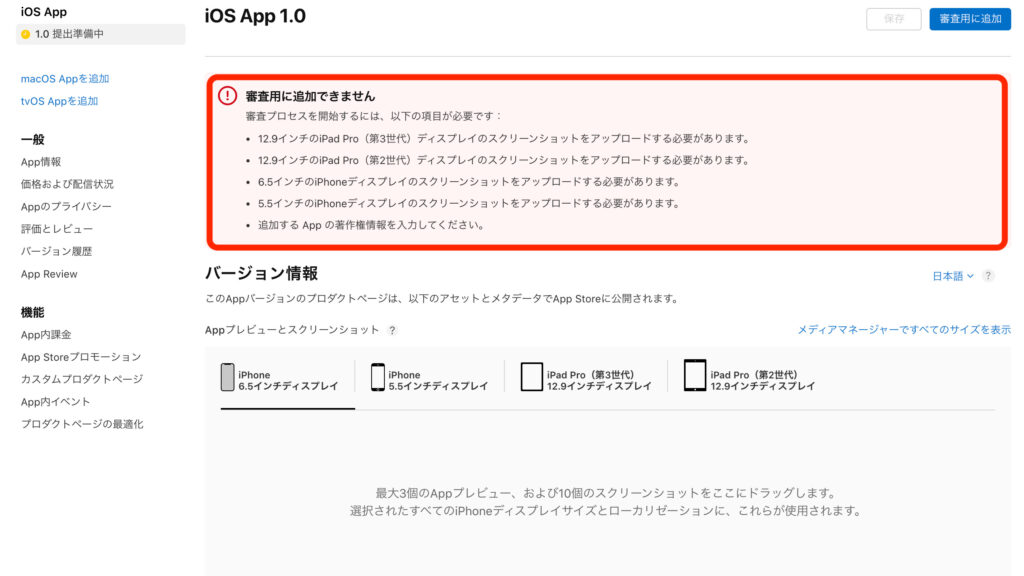
何も入力せずに審査用に追加ボタンをクリック。
そうすると最低限入力が必要な項目がピンク背景で表示される。
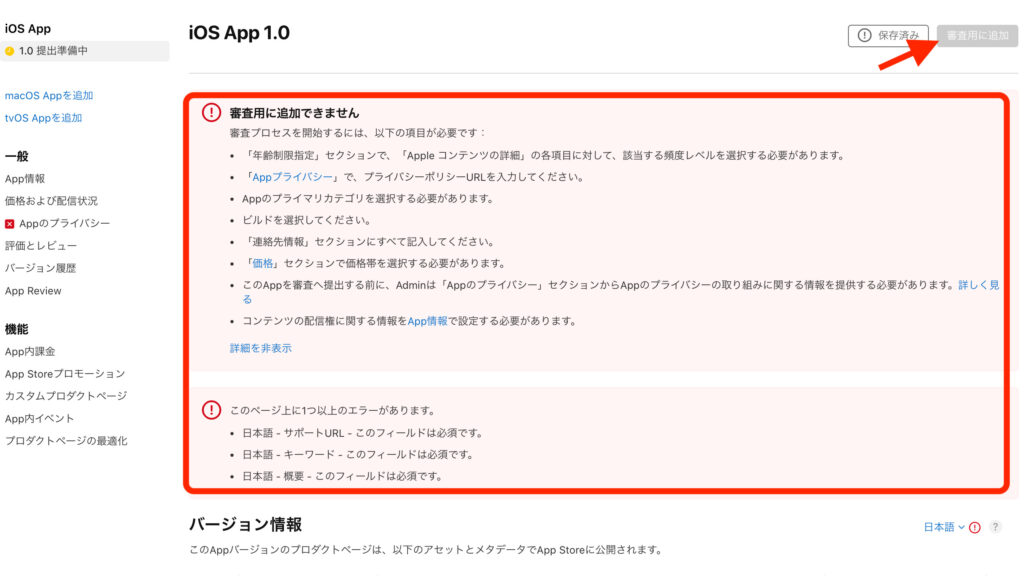
提出準備中
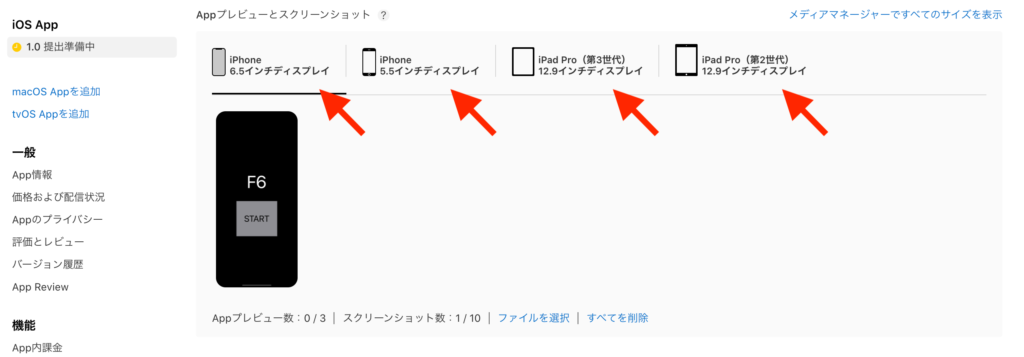
・スクショ
事前に準備したスクショをドラッグ&ドロップする。
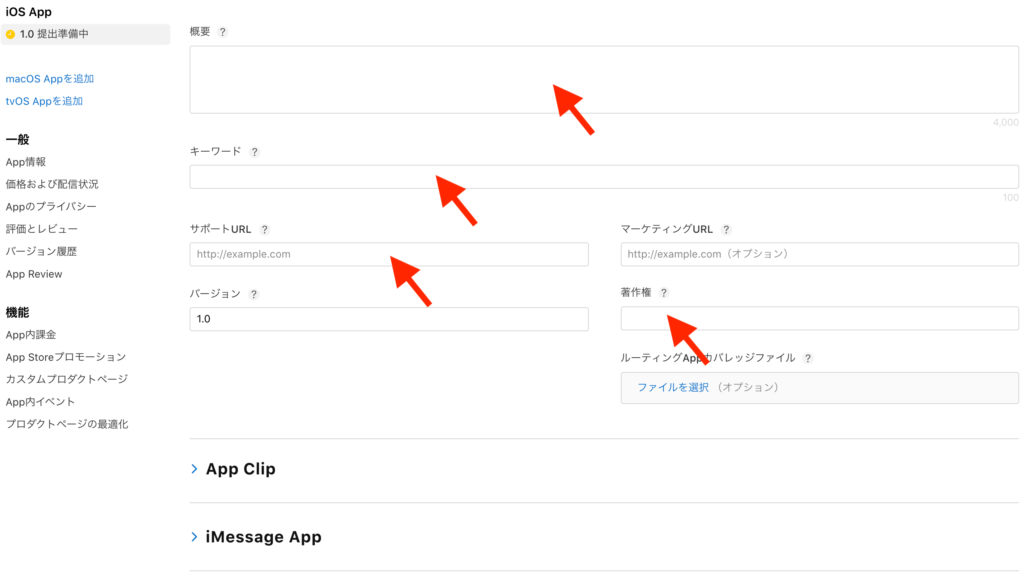
・概要
アプリの紹介文を記入。
・キーワード
アプリを検索する際に使用されるキーワードを設定。複数記入する際はカンマで区切る。
・サポートURL
事前準備で作成した連絡用ホームページを記入。
・著作権
Appの独占権の取得年、所有する人物名または組織名の順で入力(例:「2022 kazunoriri」)。
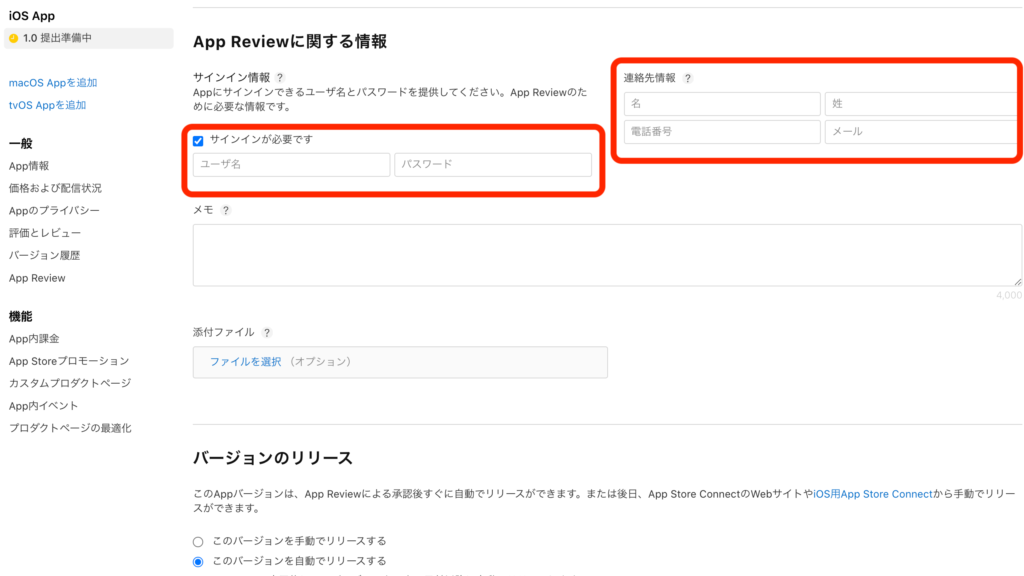
・ユーザ名、パスワード、名、姓、電話番号、メールアドレスを記入。
電話番号は国番号を付ける必要があるので「090******** 」だったら「+8190********」とする。
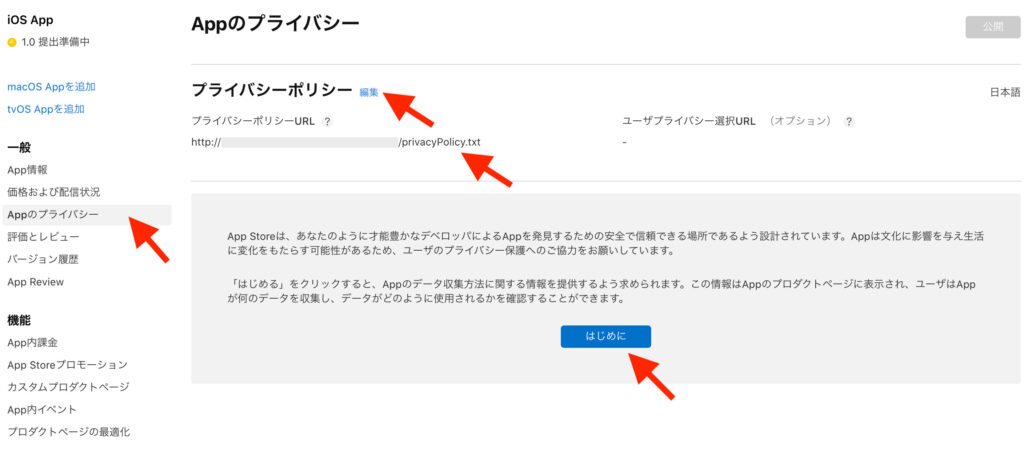
Appのプライバシー
事前に作成したプライバシーポリシーURLを入力し「はじめに」ボタンをクリック。
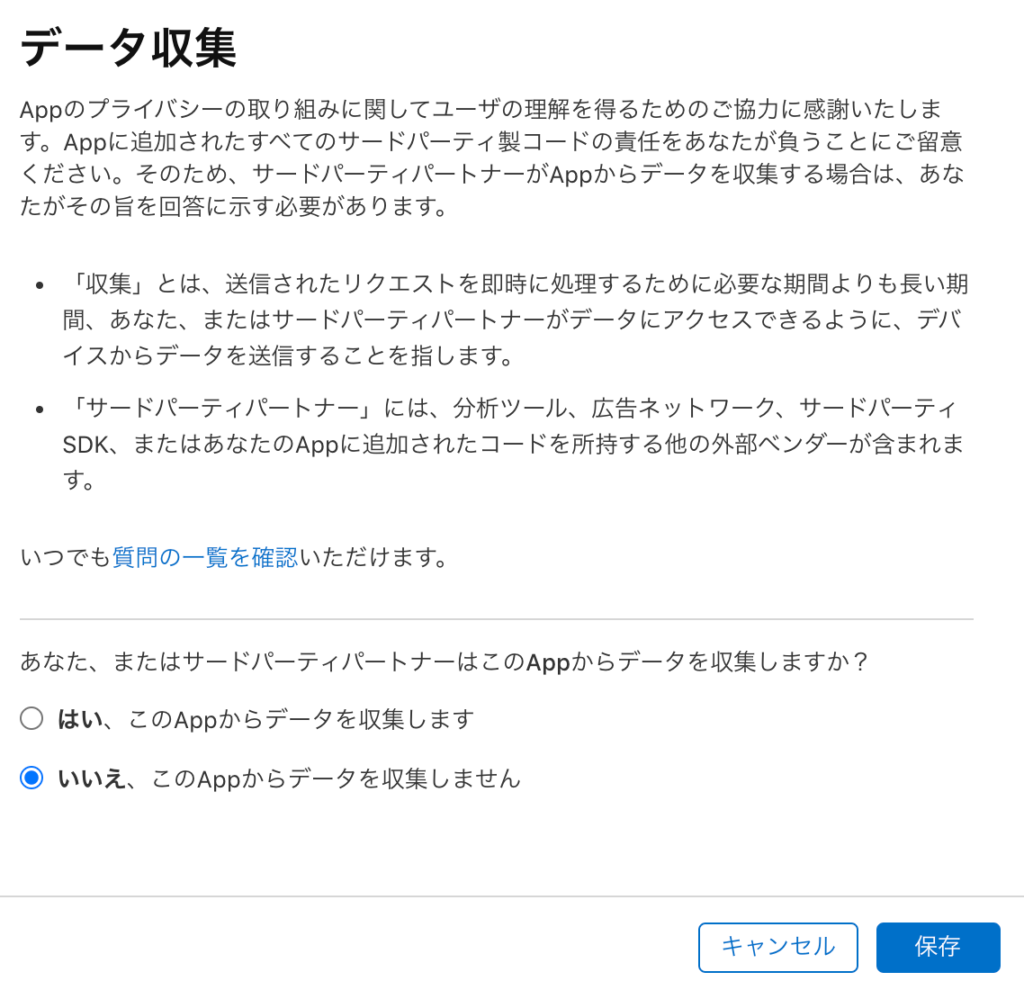
データ収集するかどうか答える。
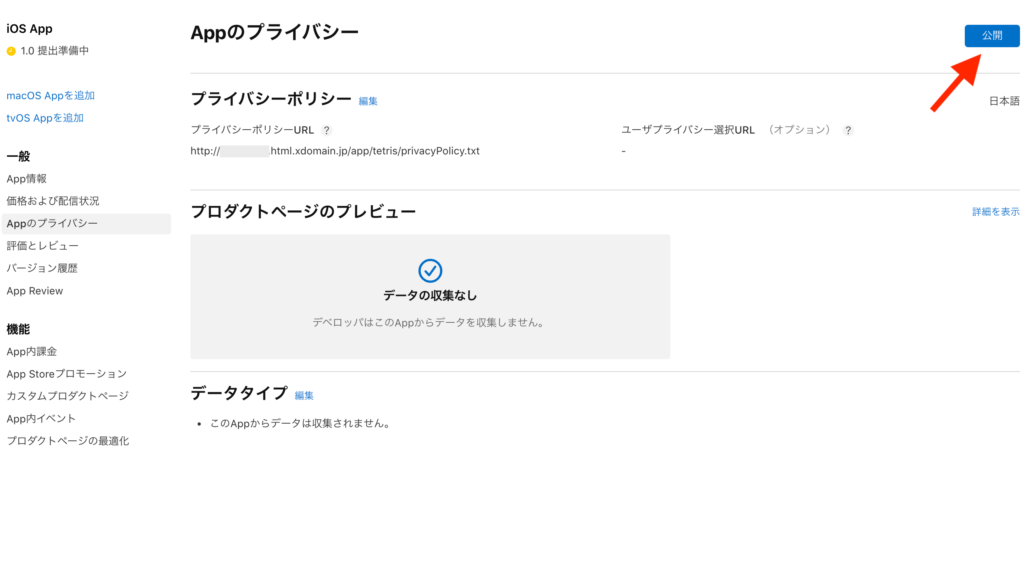
公開ボタンをクリックする。
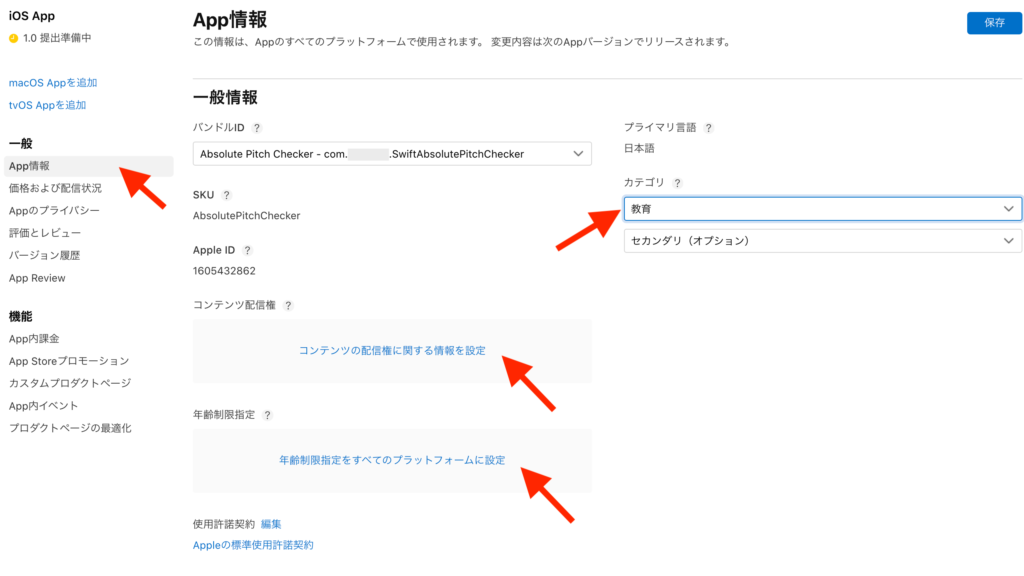
App情報
プライマリカテゴリ、コンテンツ配信権、年齢制限指定を設定。
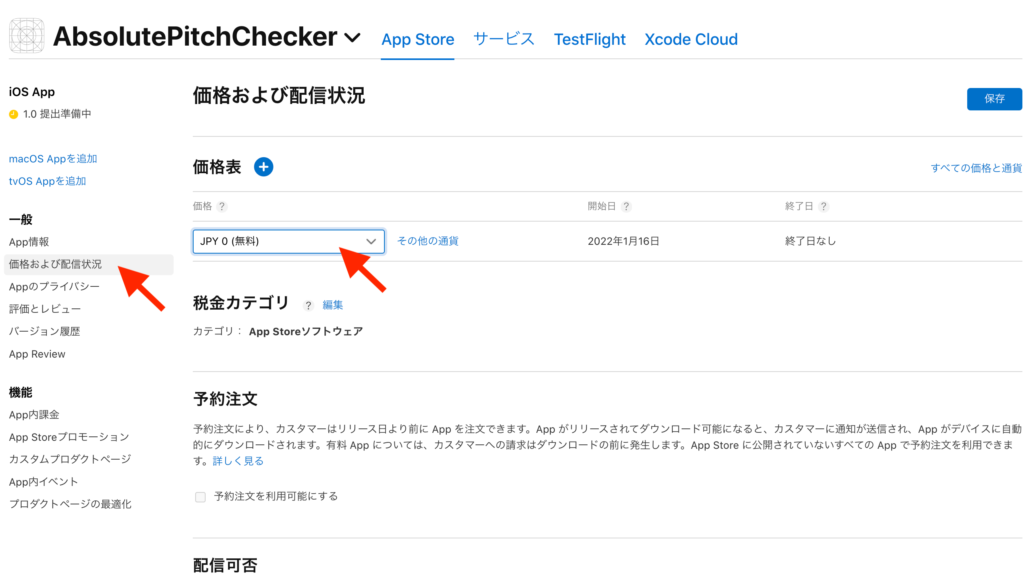
価格および配信状況
価格帯を選択。
ビルド
ここまでで残る項目はビルドだけになるはず。
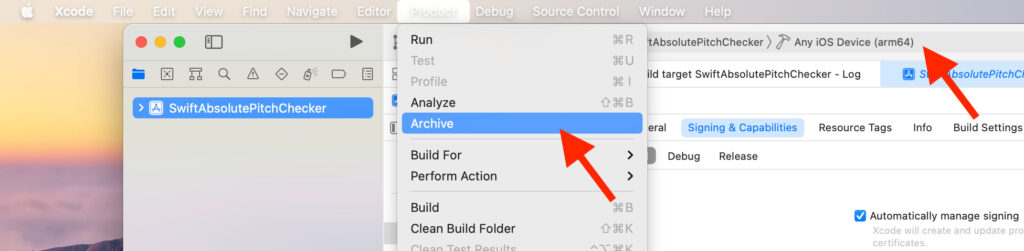
ビルドはXcodeで実施する。
Any iOS Device(arm64)を選択。
Archiveを実行。
※参考
今回は、
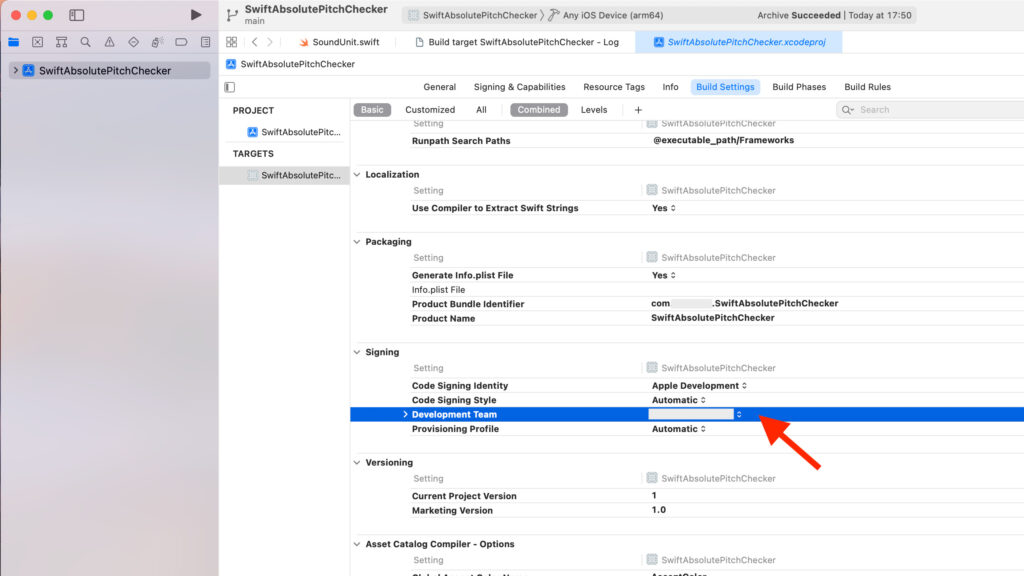
Showing Recent Messages Signing for “アプリ名” requires a development team. Select a development team in the Signing & Capabilities editor.
のエラーが出た。
Development Teamを選び直したらビルドが通るようになった。
元々Development Teamは入っていたが、なぜビルドが通るようになったのかは不明。
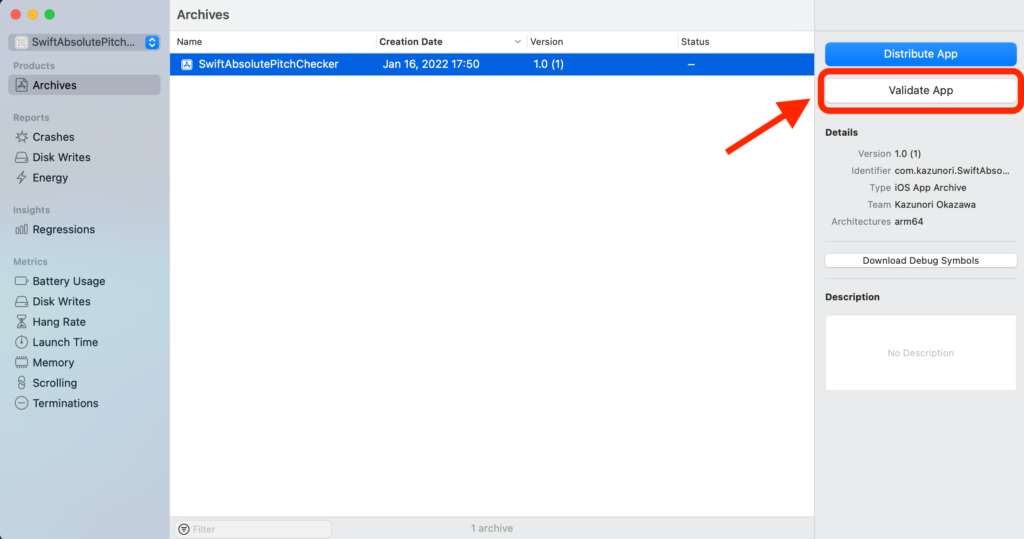
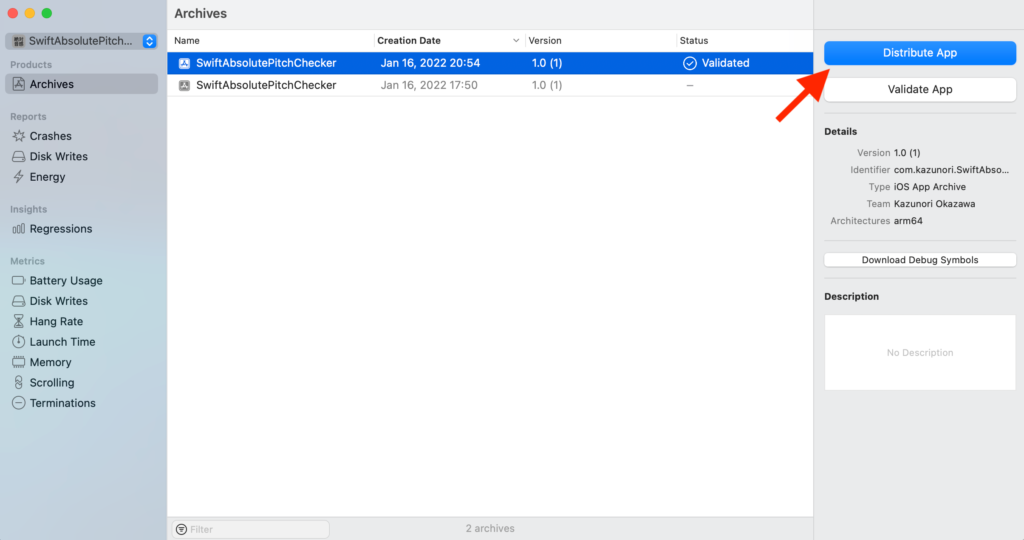
Validate Appをクリック。
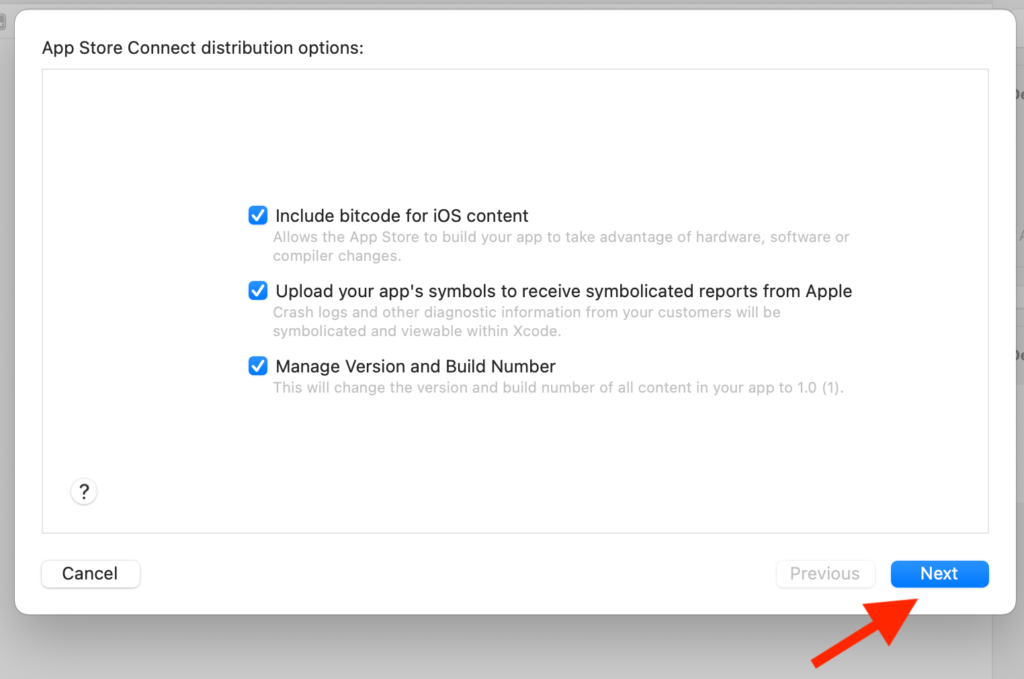
Nextをクリック。
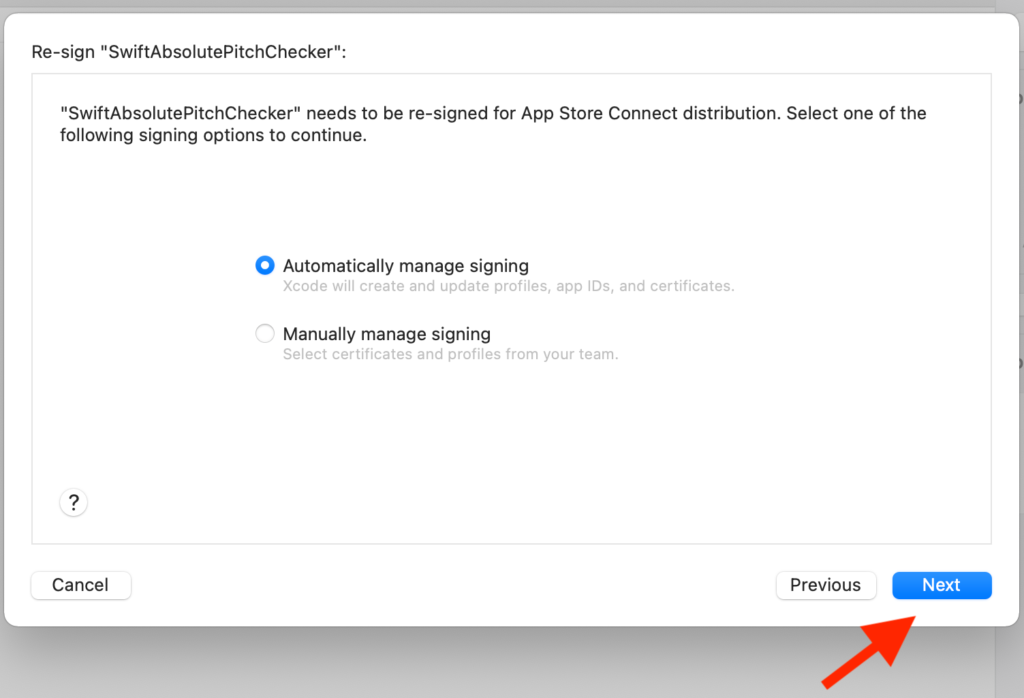
Nextをクリック。
Validateをクリック。

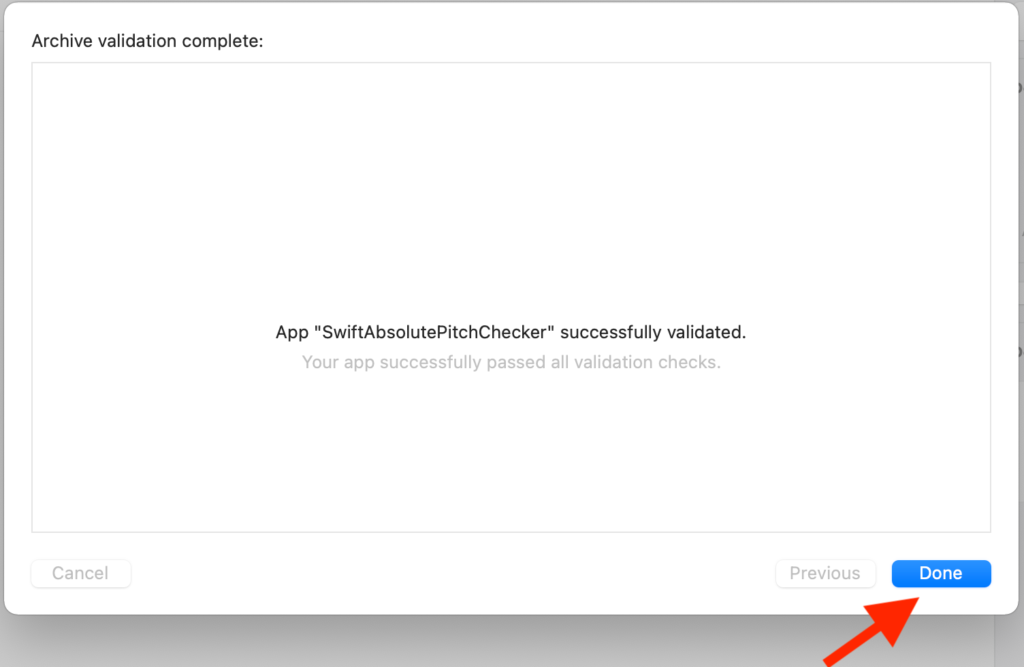
Doneをクリック。
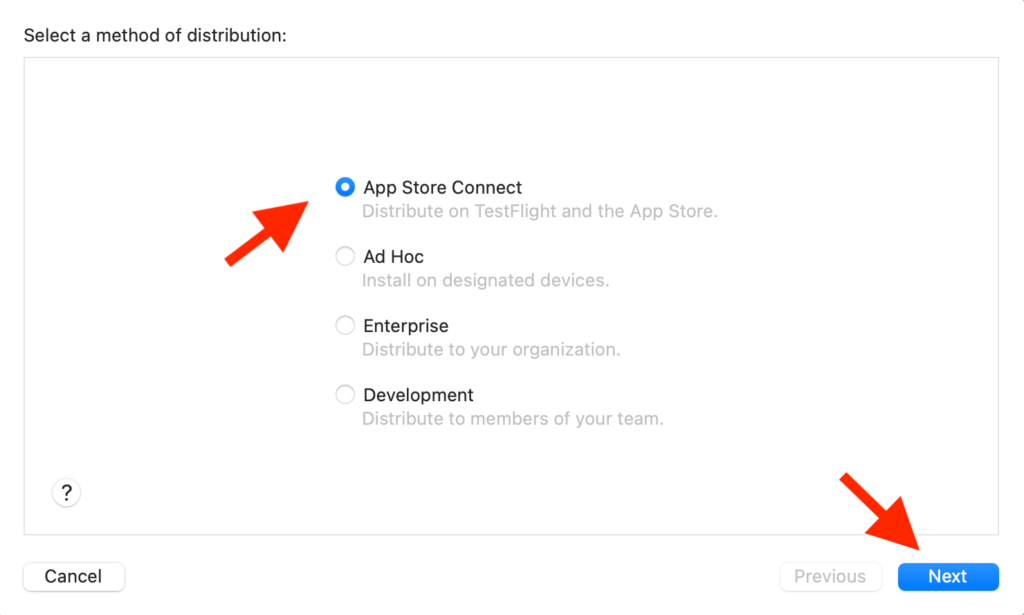
Distribute Appをクリック。
App Store Connectを選択。
Nextをクリック。
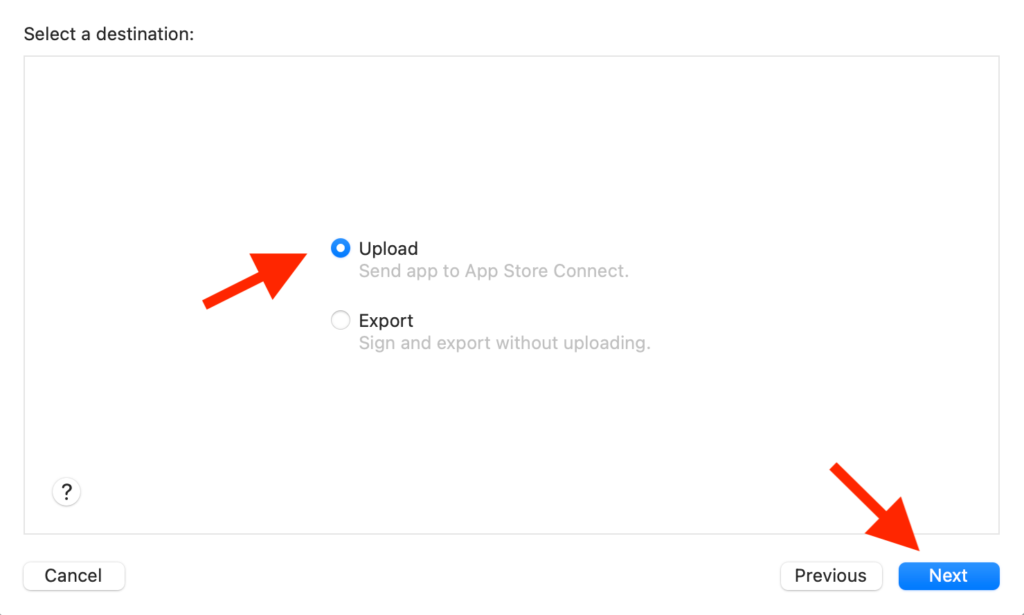
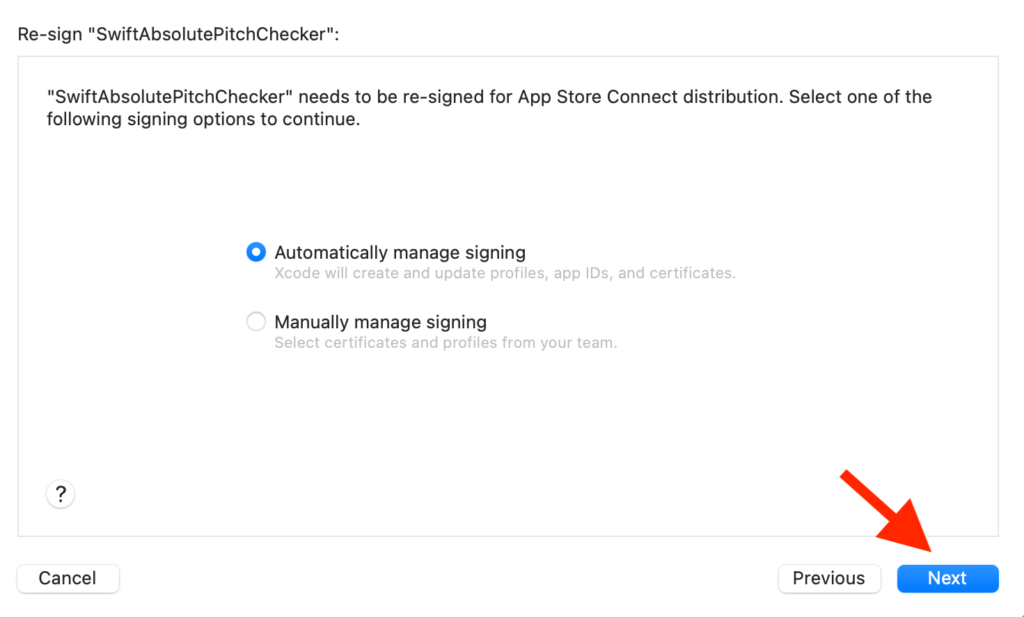
Uploadを選択。
Nextをクリック。
Nextをクリック。
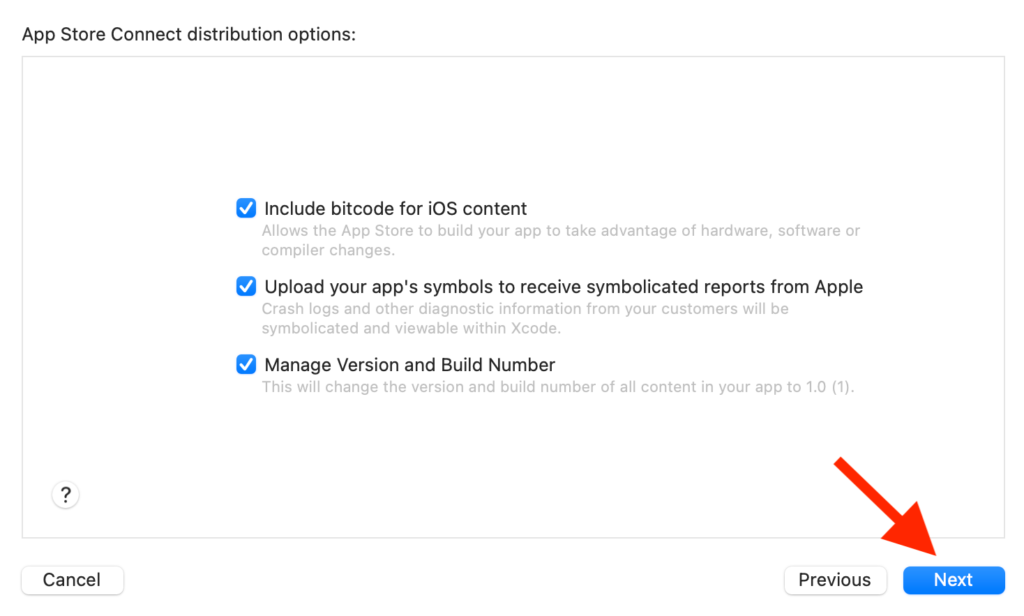
Nextをクリック。
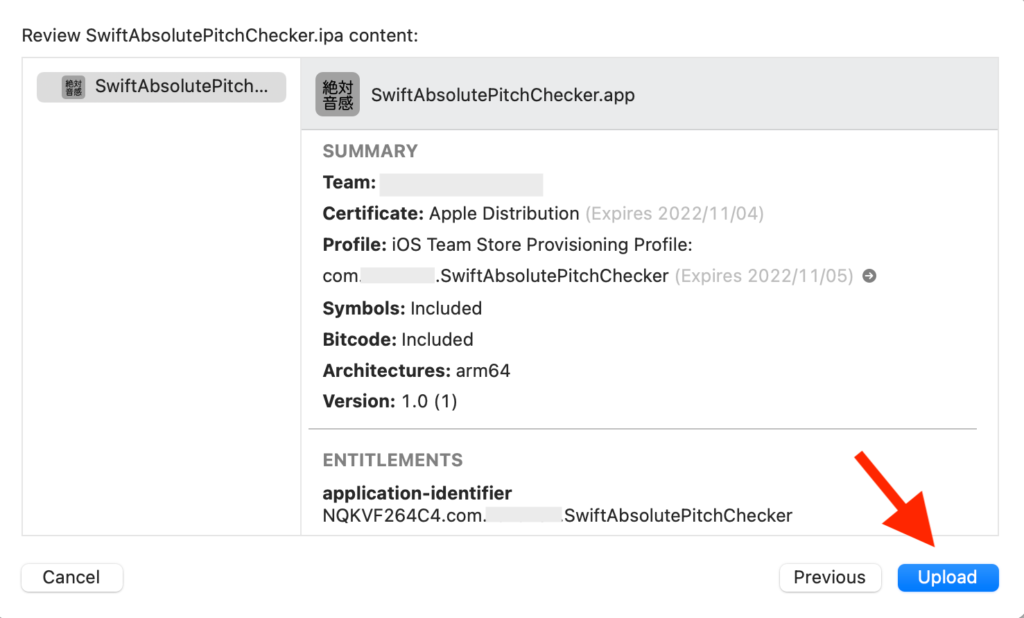
Uploadをクリック。
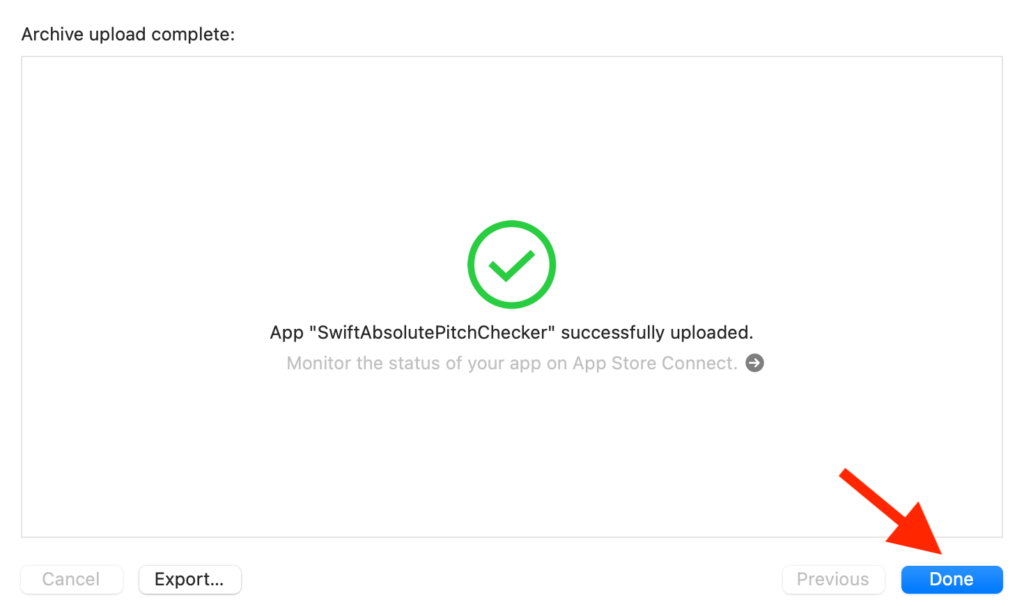
Doneをクリック。
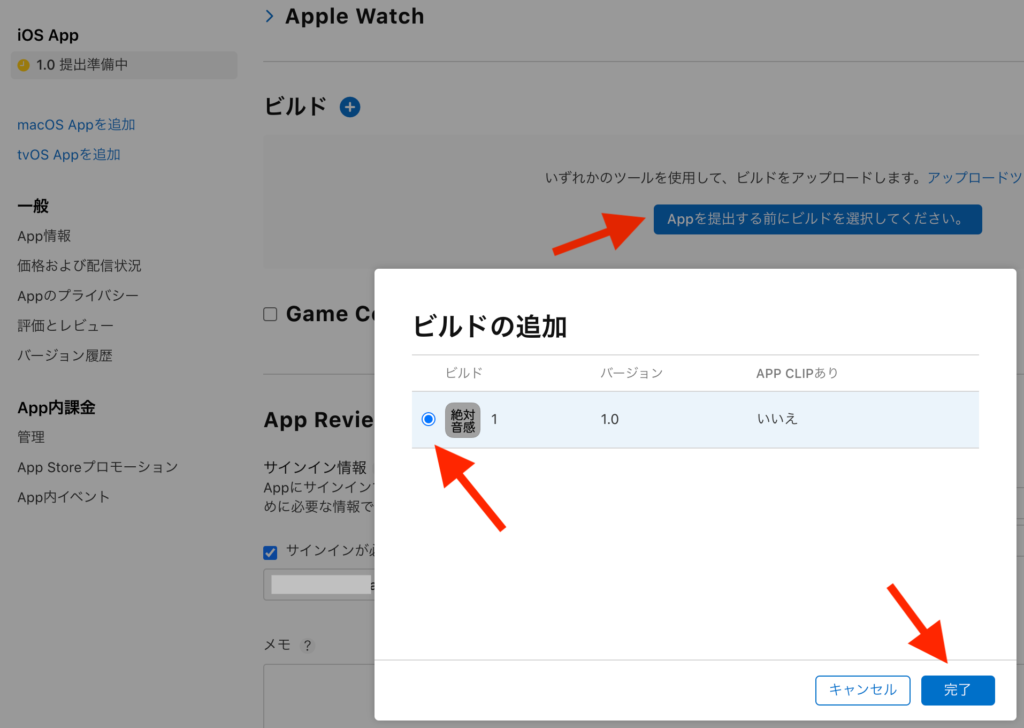
App Store Connectに行く。
ビルドの欄からビルドを追加する。
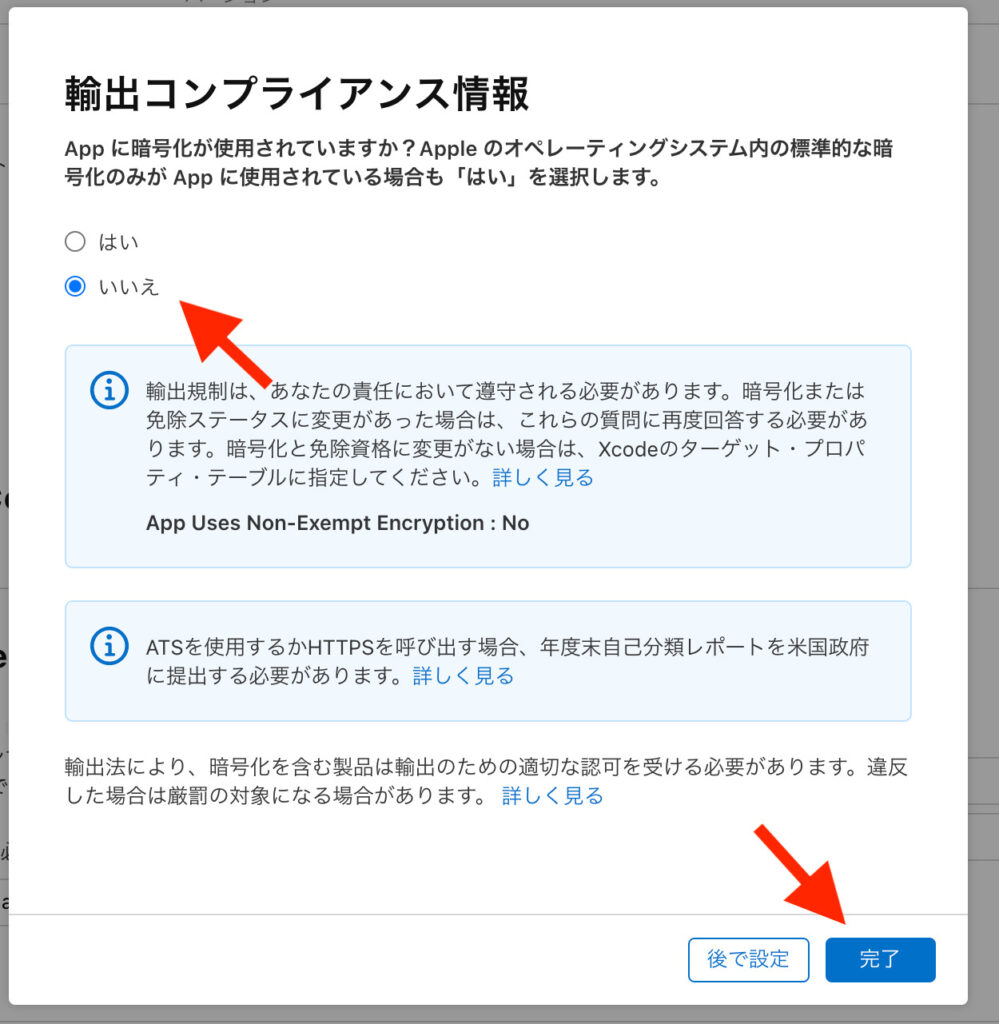
輸出コンプライアンス情報を入力する。
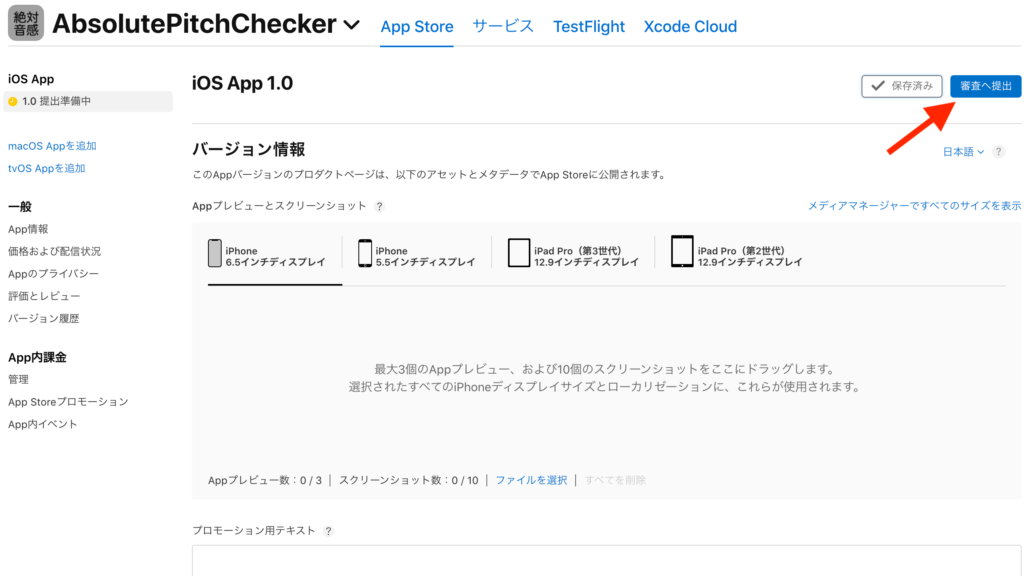
審査へ提出
審査へ提出をクリックする。
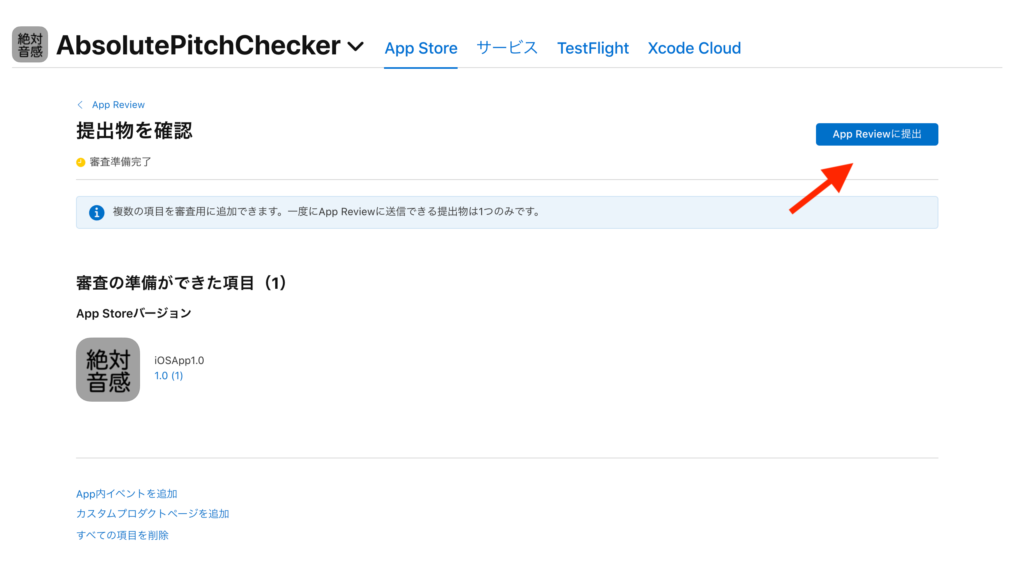
App Reviewに提出をクリックする。
完了。
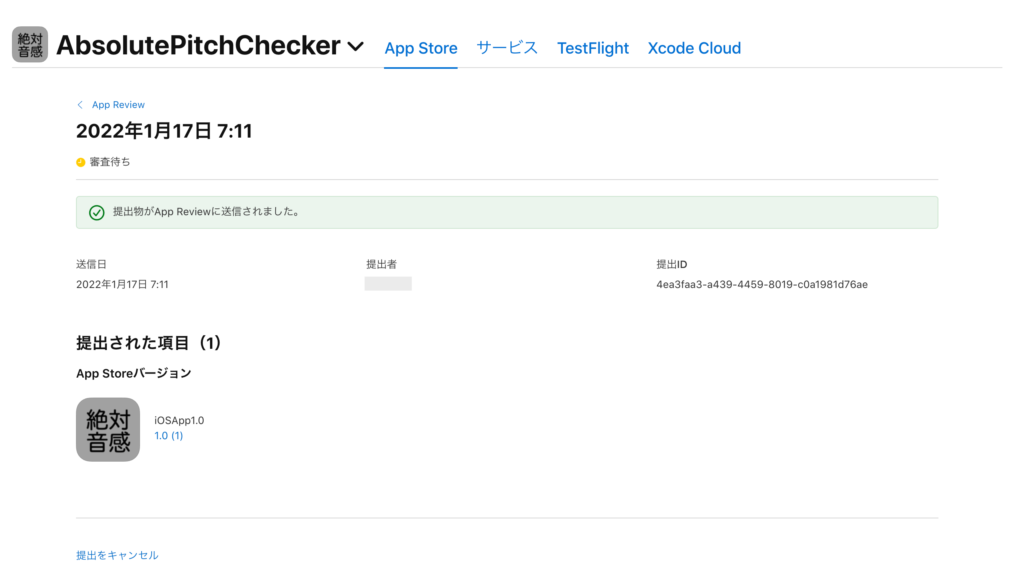
提出後数時間で承認されapp storeに公開された。
まとめ
以上、iOS appを申請し合格するまでの記録を説明した。
コメント